Hey all, Secret State is now out in a handy digital format. Enjoy it here if you didn't get a copy at ArtPrize or homecoming.

Sunday, November 10, 2013
Monday, September 23, 2013
Comic projects: Secret State and Spartan Super Hero Legends
Hey all, I'm going to be at ArtPrize this Saturday giving out AWESOME FREE STUFF.


#1 is the book Spartan Super Hero Legends, produced to celebrate this year's comic-themed homecoming at MSU. Half a dozen student and alumni artists (myself included) contributed pages to it and will be signing and giving away copies at the event.

#2 is the mini-sketchbook I put together JUST FOR THIS. "Secret State" is 20 pages of photos and drawings I did while I was at MSU. The inside of the cover has a map of campus showing exactly where I was for each page. These are in SUPER SHORT SUPPLY so come early if you want to get one.

Da cover.

Center spread.

Also, photos!
#3 I'll also have some nice postcards with my work on them.
I'll be at the ArtPrize Hospitality tent at 533 Monroe Avenue Northwest from 11am-3pm this Saturday.
I'm ALSO going to be at MSU's homecoming on October 9th, signing more copies of Super Hero Legends and giving away any of the remaining sketchbooks. Geoff Johns, Chief Creative Officer of DC Comics, is coming and will be giving a talk beforehand that you can register for here: http://alumni.msu.edu/events/geoffjohns/index.cfm. The talk is at 7:00 and the signing is immediately after. Both are at the Broad Art Museum. Come say hi and pick up a copy!
Thursday, September 19, 2013
First 3D Print!
And it's adorable! I'm really impressed by the fidelity of detail.


It's the ytram, from Riven. I modeled him in Blender and used ZBrush's 3d print export plugin to scale his proportions.
The print is from Shapeways, using the frosted ulra-detail material.
Sunday, September 15, 2013
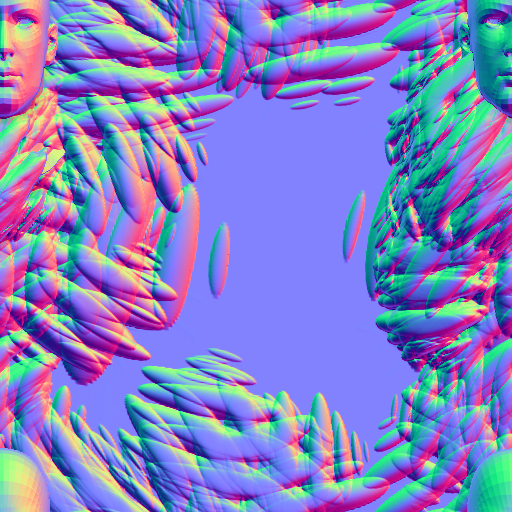
Tutorial: ZBrush Tiling Textures in 3D
Remember when I posted this

and was all like, "I've finally solved zbrush tiling textures!" and the didn't say how I did it? Yeah, that was a dick move. It also bit me when I tried to do it again today, only to realize I'd more or less forgotten how. So, I spent some time retracing my steps and I think I've got it down again. This time I'm going to be smart about it and write it down.
This method holds some significant advantages over the better-known 2.5D + tilde key method illustrated here because it allows you to rotate the model while you work, but as we shall see it has some drawbacks, too.
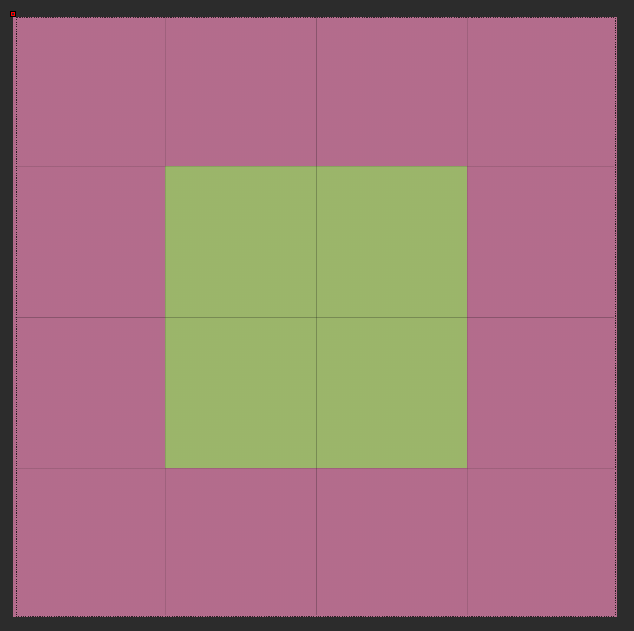
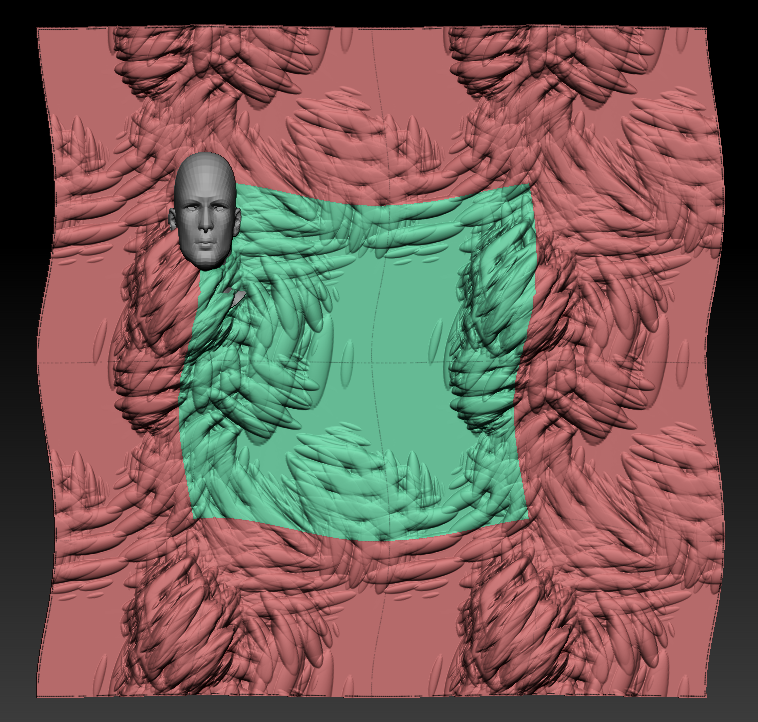
Create a 4x4 polyplane and group the middle four polys together. The yellow area is where our final texture is going to be.
Subdivide as many times as you think you'll need (without smoothing) and store a morph target.
Sculpt to your heart's content, using brushes with wrap mode (brush>curve>WrapMode) set to 2.
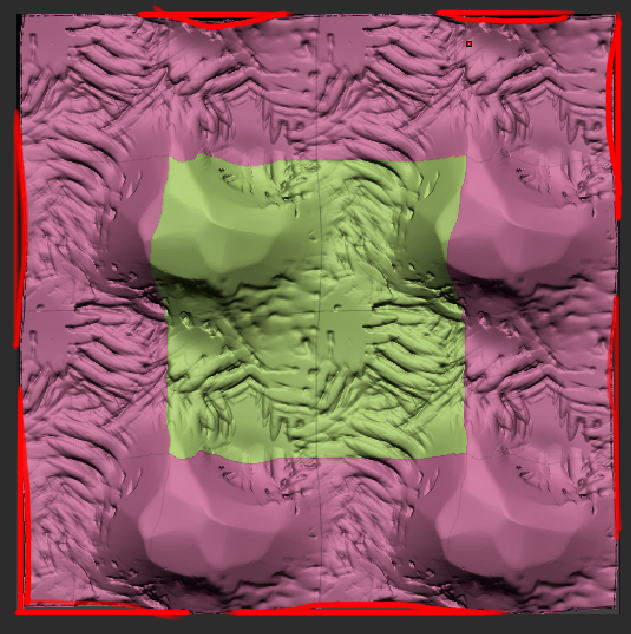
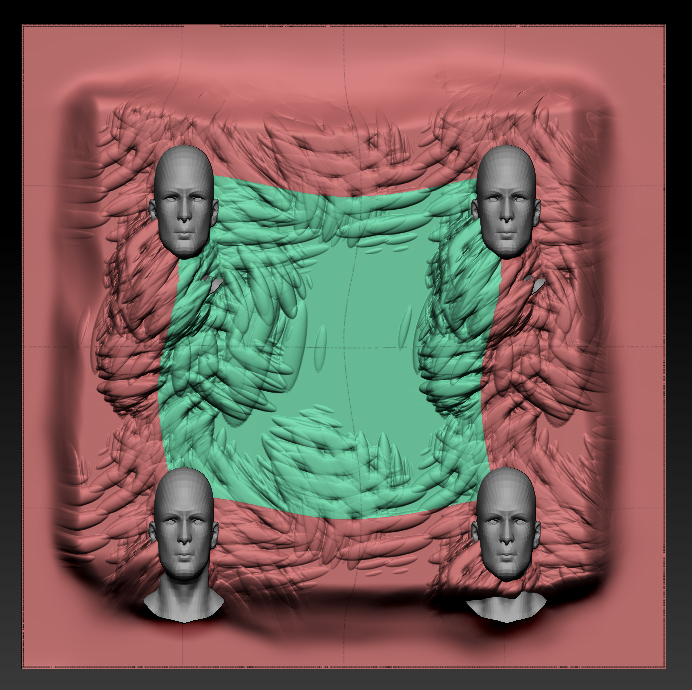
Now at some point, you've probably nudged around the border of your plane to the point where "fit mesh to frame" leaves gaps around the border. That's no good.
Time to break out the morph brush! Go to the highest subdiv level and carefully morph back the plane's borders, taking care not to get too close to the yellow area.
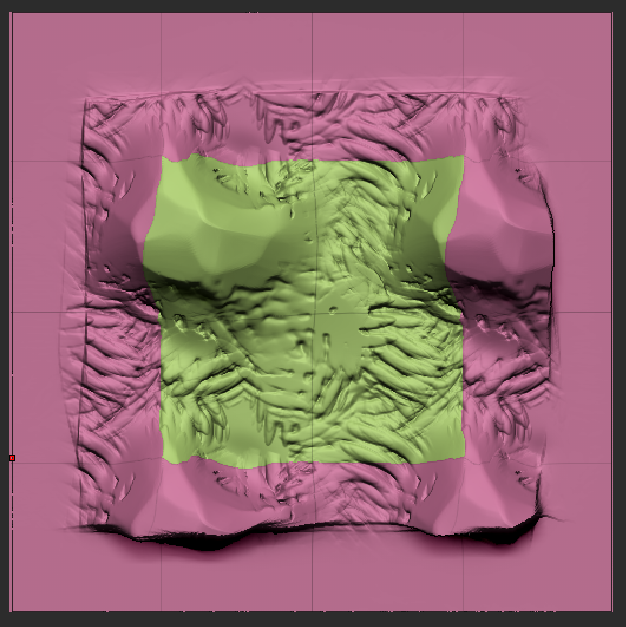
Frame the mesh, and use grabdoc to get maps for color, normals, and/or height.
Bring the maps into your image editor of choice and crop the canvas to 50%.
Voila! Perfectly tiling textures with NO seams whatsoever!
The big drawback to this method is that it doesn't work with dynamesh, and all the wonderful insert mesh brushes that come with it. It can work with appended subtools, as long as they're kept safely away from the yellow border.
However, if you still want to use inserted meshes on the border area, there is a way to do so.
Position your subtool on the seam where you want it.
Duplicate it, and using the deform sliders, offset it exactly 100 units so it's on the opposite side of the green square. (This is provided that you started with the default zbrush plane and haven't scaled it at all.)
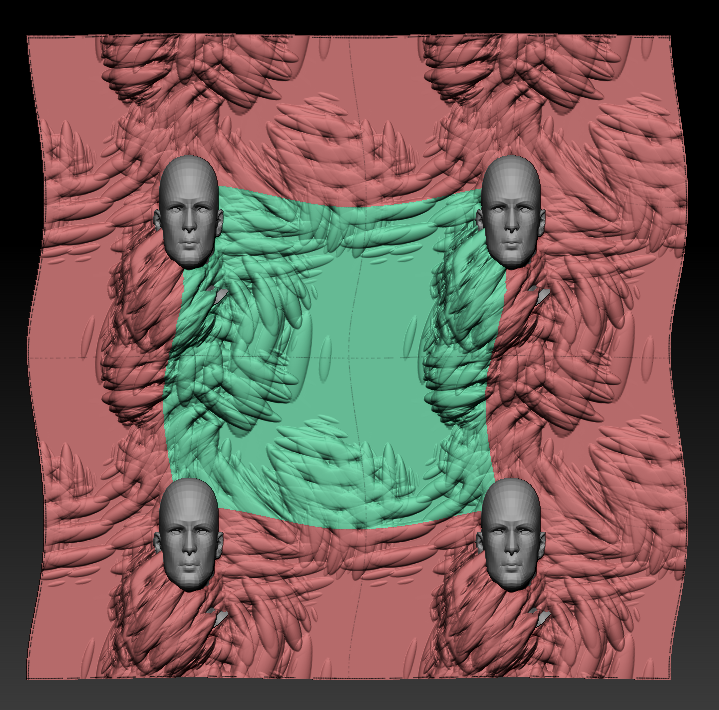
If the subtool intersects a corner you'll need to do this two more times, for all four corners. If you want to nudge them around afterwards, just merge them together and use the move tool to re-position.
You can keep the ztools as they are and keep working, or grab the zproject brush (make sure it's set to wrap mode of 2) and use it on your plane to project details from the underlying subtools, then delete them when you're done.
When you're finished, morph back the borders as we did before, frame the document, and grab your maps!
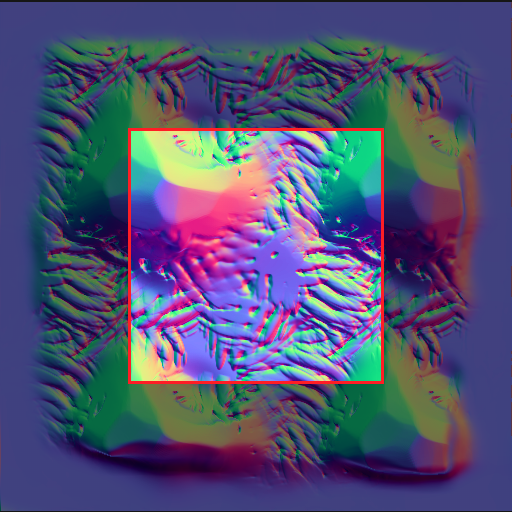
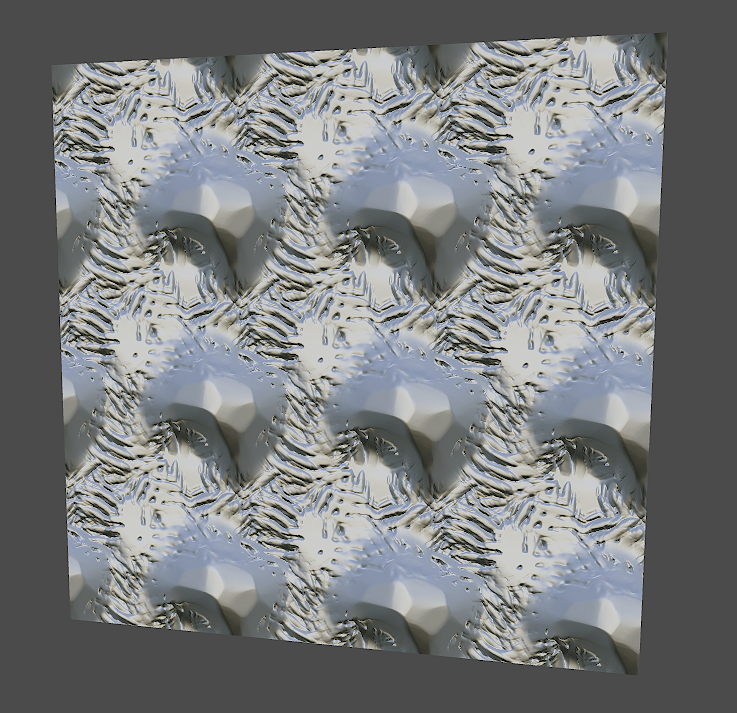
This is what my final, cropped normalmap looks like.
An additional, smaller drawback to this technique is that you can't use the morph brush while you sculpt, because it's being used to hold the blank plane. If you're super-dependent on morph targets for sculpting, you can always mask out the edges of the plane instead. Just be very careful that you don't accidentally un-mask while you're sculpting, and save a new morph target at the highest subdiv level when you're done.

and was all like, "I've finally solved zbrush tiling textures!" and the didn't say how I did it? Yeah, that was a dick move. It also bit me when I tried to do it again today, only to realize I'd more or less forgotten how. So, I spent some time retracing my steps and I think I've got it down again. This time I'm going to be smart about it and write it down.
This method holds some significant advantages over the better-known 2.5D + tilde key method illustrated here because it allows you to rotate the model while you work, but as we shall see it has some drawbacks, too.
Create a 4x4 polyplane and group the middle four polys together. The yellow area is where our final texture is going to be.
Subdivide as many times as you think you'll need (without smoothing) and store a morph target.
Sculpt to your heart's content, using brushes with wrap mode (brush>curve>WrapMode) set to 2.
Time to break out the morph brush! Go to the highest subdiv level and carefully morph back the plane's borders, taking care not to get too close to the yellow area.
Frame the mesh, and use grabdoc to get maps for color, normals, and/or height.
Bring the maps into your image editor of choice and crop the canvas to 50%.
Voila! Perfectly tiling textures with NO seams whatsoever!
However, if you still want to use inserted meshes on the border area, there is a way to do so.
Position your subtool on the seam where you want it.
If the subtool intersects a corner you'll need to do this two more times, for all four corners. If you want to nudge them around afterwards, just merge them together and use the move tool to re-position.
You can keep the ztools as they are and keep working, or grab the zproject brush (make sure it's set to wrap mode of 2) and use it on your plane to project details from the underlying subtools, then delete them when you're done.
When you're finished, morph back the borders as we did before, frame the document, and grab your maps!
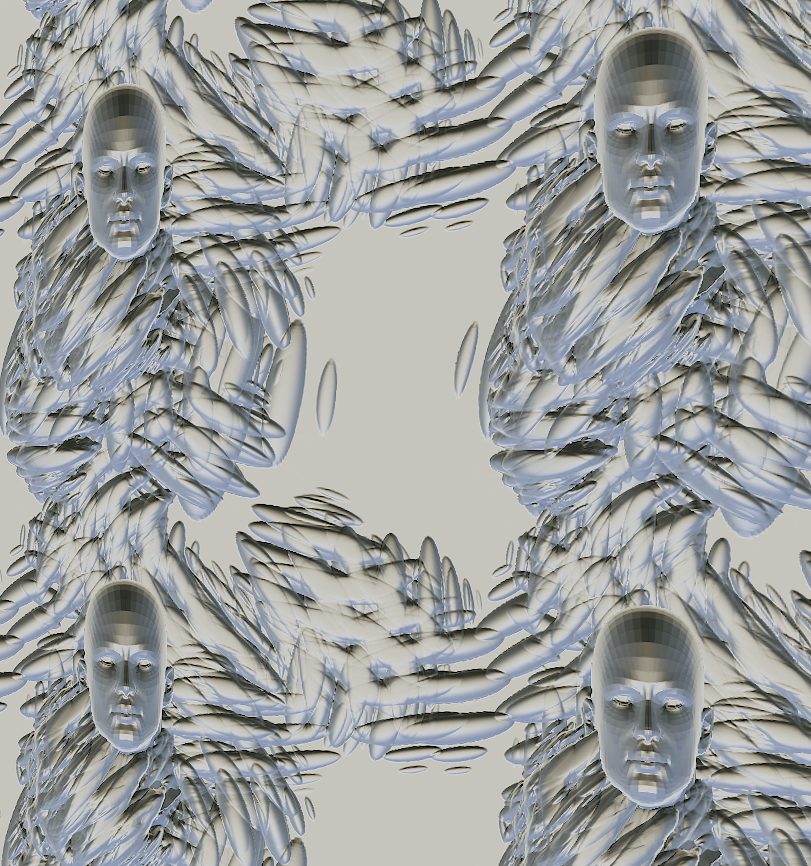
This is what my final, cropped normalmap looks like.
And here it is applied to a plane in Toolbag. Beautiful!
Thursday, September 12, 2013
Tutorial: Exporting skinned skeletal meshes from Blender to UDK as PSK/PSA
or, "Did I really just spend the last two days on this?"
I've been working on this riddle for twelve hours now
(thanks for nothing, google) but I finally managed to get my rigged, animated
model into UDK. I'm putting it here because eventually it's going to come up
again when I've forgotten the process, and to spare any poor souls all the
anguish it's caused me.
"Exporting skinned skeletal meshes from Blender (2.68) to
UDK as PSK/PSA"
What I noticed is that edge splits and armatures can both be
exported, but not the same time. The trick is to export the mesh and animation
separately, with different settings applied.
Export mesh (psk) only:
- With appropriate edges marked as sharp (but no edge split modifier applied).
- WITHOUT an armature modifier applied (very important!)
- "Smooth groups" is checked in the PSK export options.
- DO NOT check 'rebuild on export' in the export options.
- If you can hit "check mesh vertices" and the duplicated model looks normal (not deformed) you're good to go.
Export animation (psa) only:
- WITH an armature modifier applied.
- DO check rebuild on 'export' in the export options.
- Doesn't matter if your edges are sharp or not.
Other notes:
- Make sure you have at least one material applied to your mesh, or else the exporter will throw an error.
- UDK will import separate material channels for each texture on your object in Blender.
- DO NOT try to export either psa or psk with a mesh split modifier- it will crash Blender.
- The FBX exporter is a million times easier than this and works fine for both static meshes and rigid-skinned animations, but does not like to work with paint weights that are set anywhere between 0 and 1, so it's not suitable for organic animations like humans or animals.
Good grief, this would've taken 30 seconds to do in Unity.
Sunday, September 1, 2013
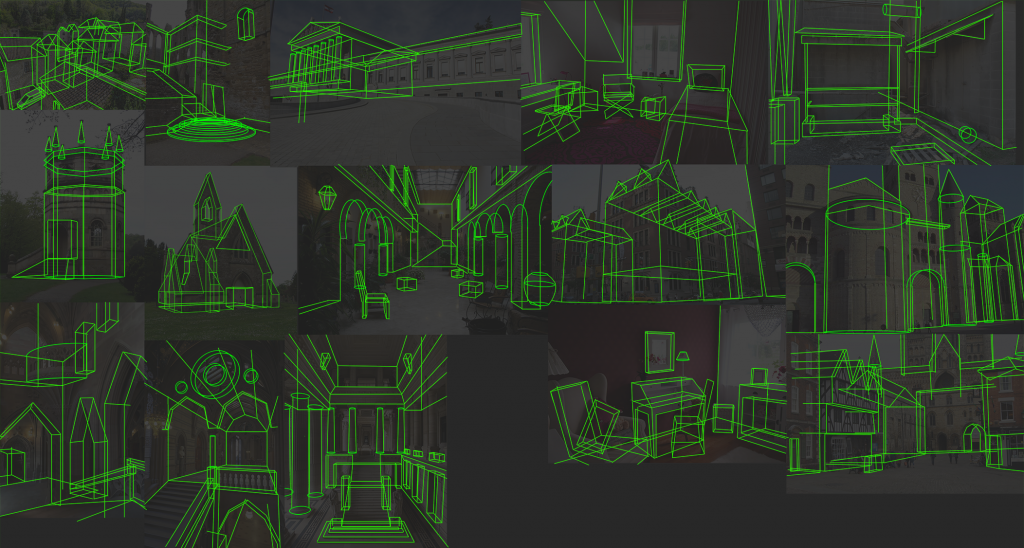
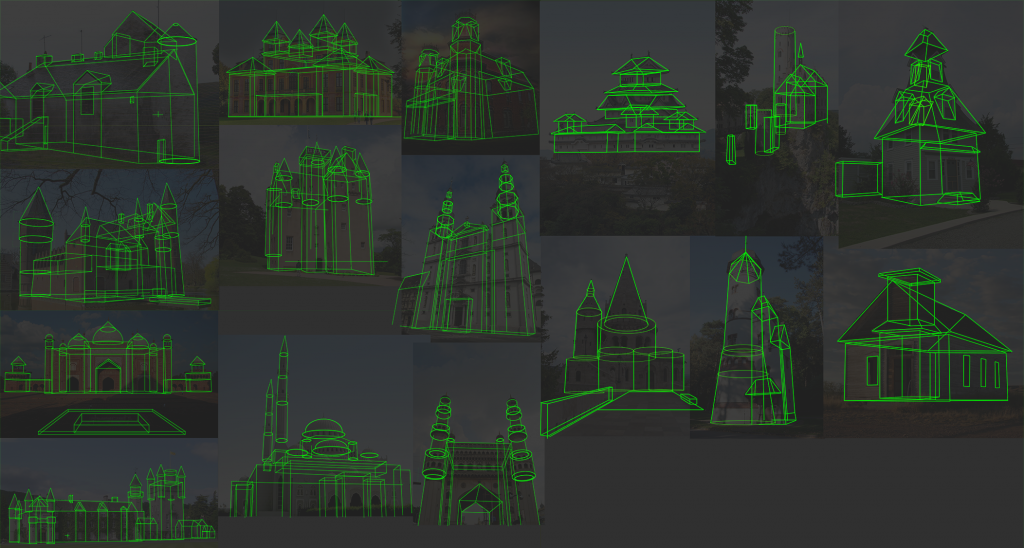
Warwielder Art
I recently finished my freelance job, making buildings for the unreleased game, Warwielder. These are based on concept illustrations by the very talented by Giacomo Tappainer. There's a polycount thread where I posted wireframe shots, but here are the finished products:


Wednesday, June 12, 2013
Tuesday, June 11, 2013

Monday, June 10, 2013
Maddox
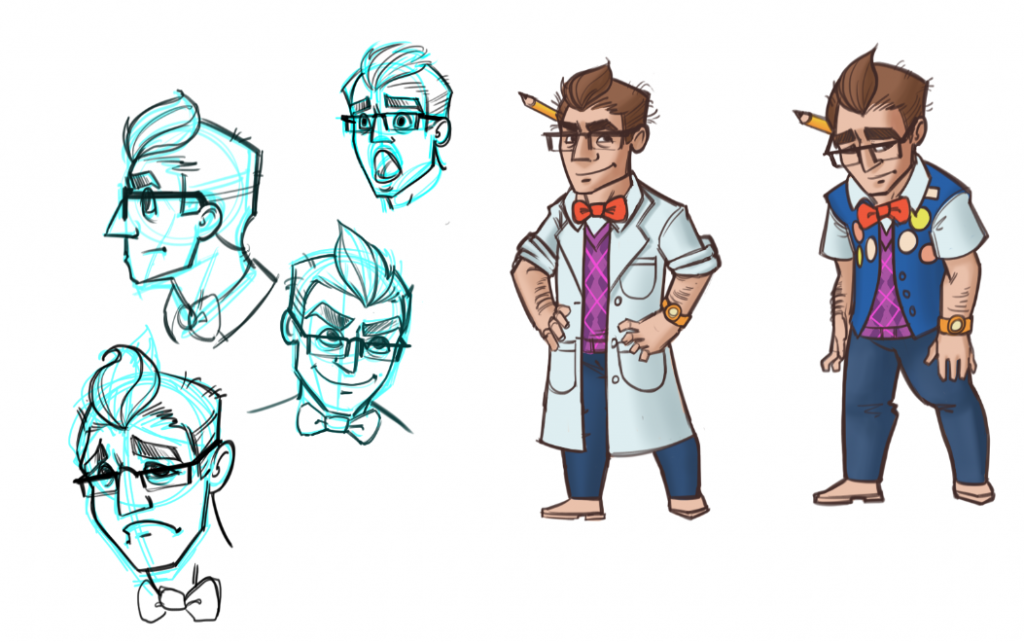
Little bit of character design done for my friend Mike. His character, Robert Maddox, is a fashion-forward mad scientist who's forced to take a job at the local U-Mart when his plans for world domination fall through.
Mr. Calavera
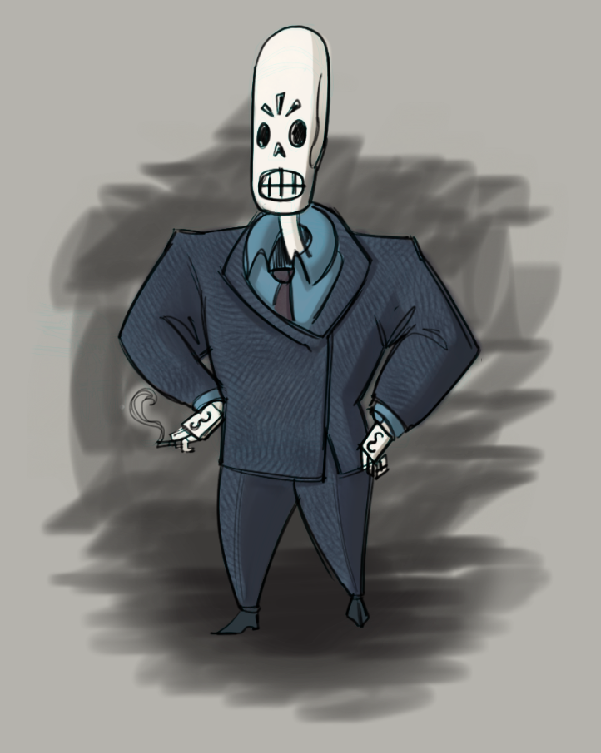
Just playing around with Sketchbook's many fine brushes. I need to figure out a better way of adding color to line art.
Thursday, June 6, 2013
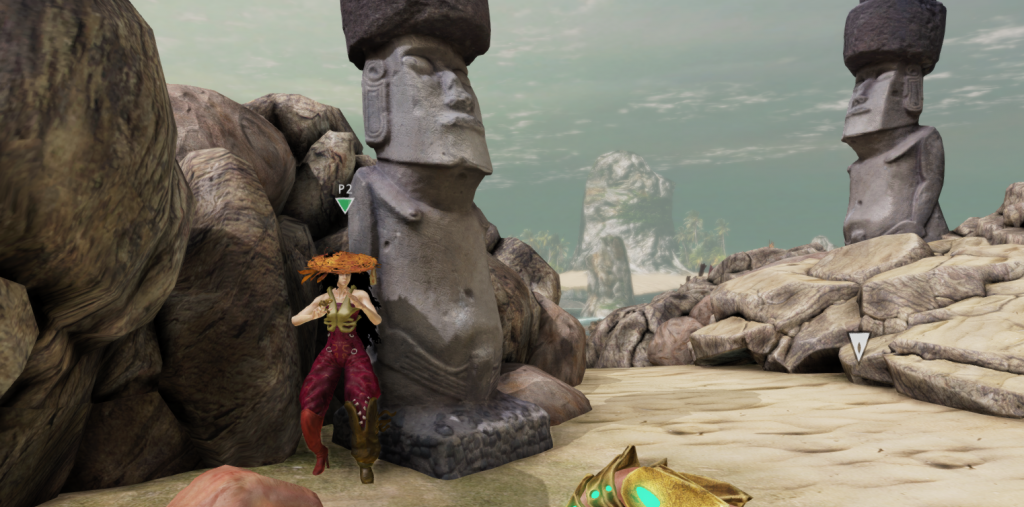
Zeno Clash plaza
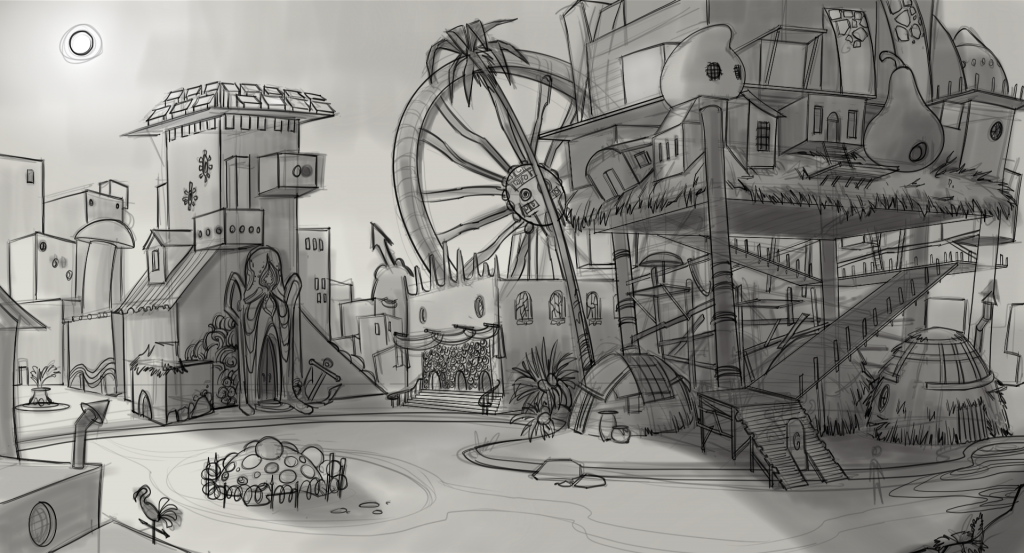
Zeno Clash 1 and 2 explore a lot of Hastledom, but I don't think either has covered where Father-Mother and her family live. Somehow I just sort of picture a giant nest tower. With a ferris wheel of torment in the background. The structure on the left is the headquarters of a rival clan.
Zeno Clash arena
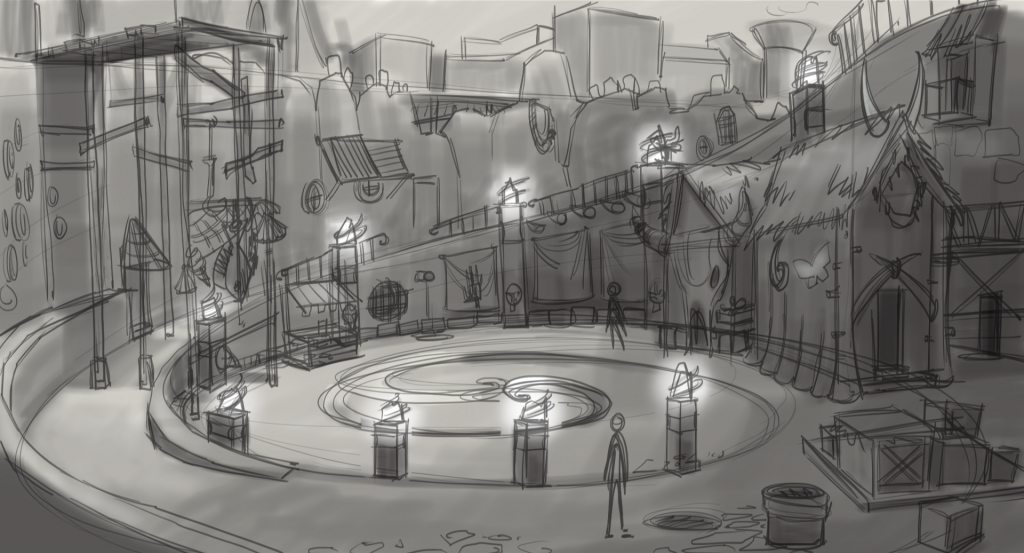
So after years of yearning, I finally gave in and bought my very own Cintiq! To break it in I installed the newest version of Sketchbook Pro, and wow- Sketchbook has gotten really good. Sometime in the last few years they added presets for all the kinds and colors of copic markers. It's stupid, because obviously those colors have existed there forever, but it really does feel like I just bought a thousand dollars worth of markers. Fun! So here's some of me testing out the digital waters with some very Zeno Clash-inspired scenery.
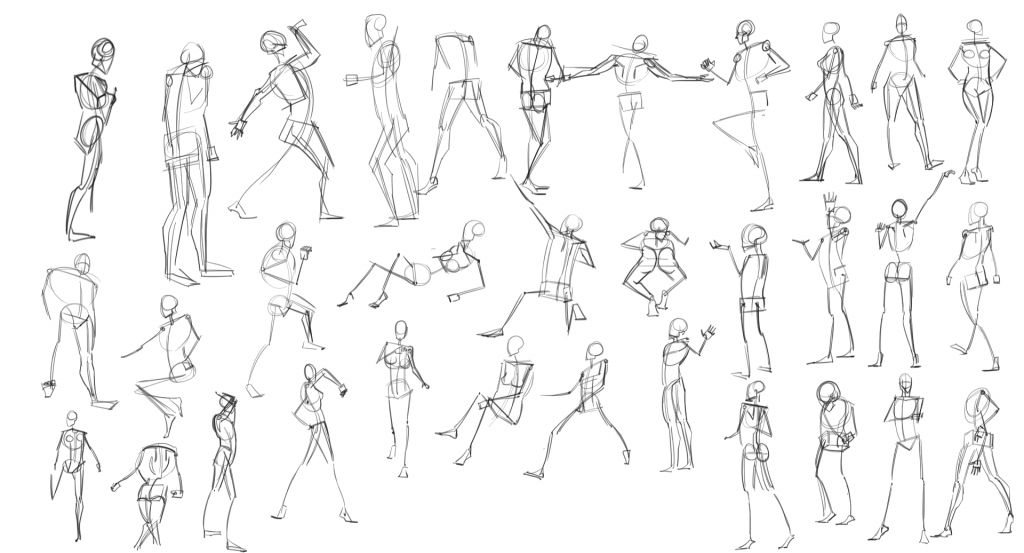
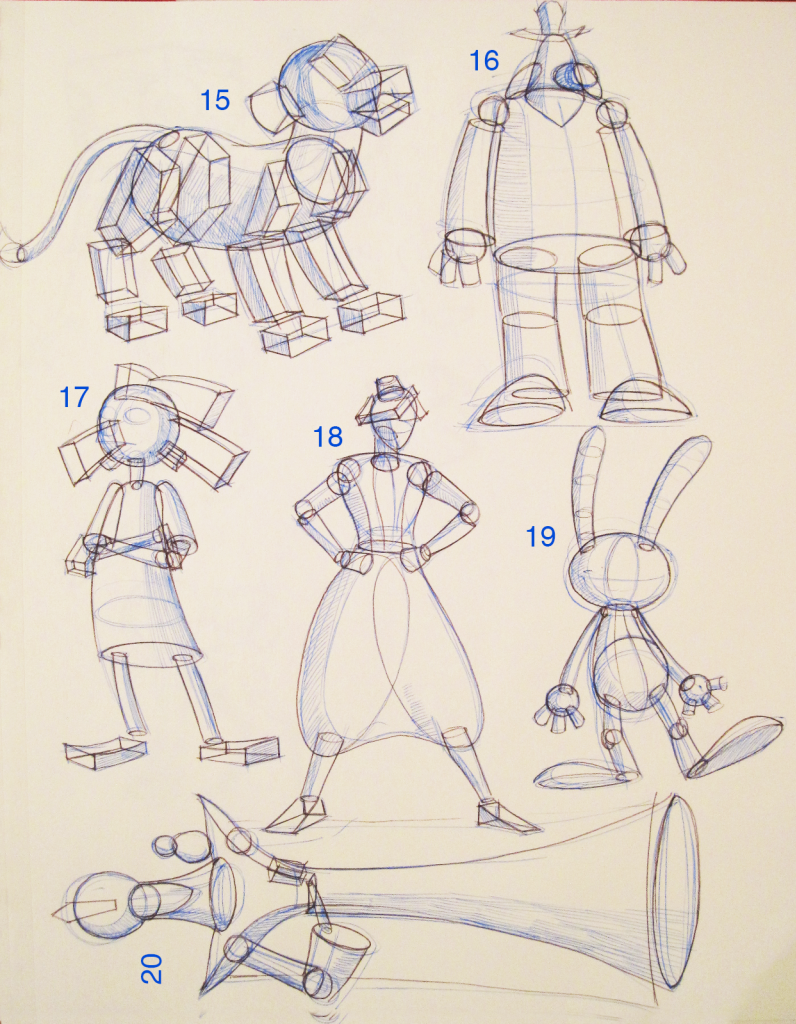
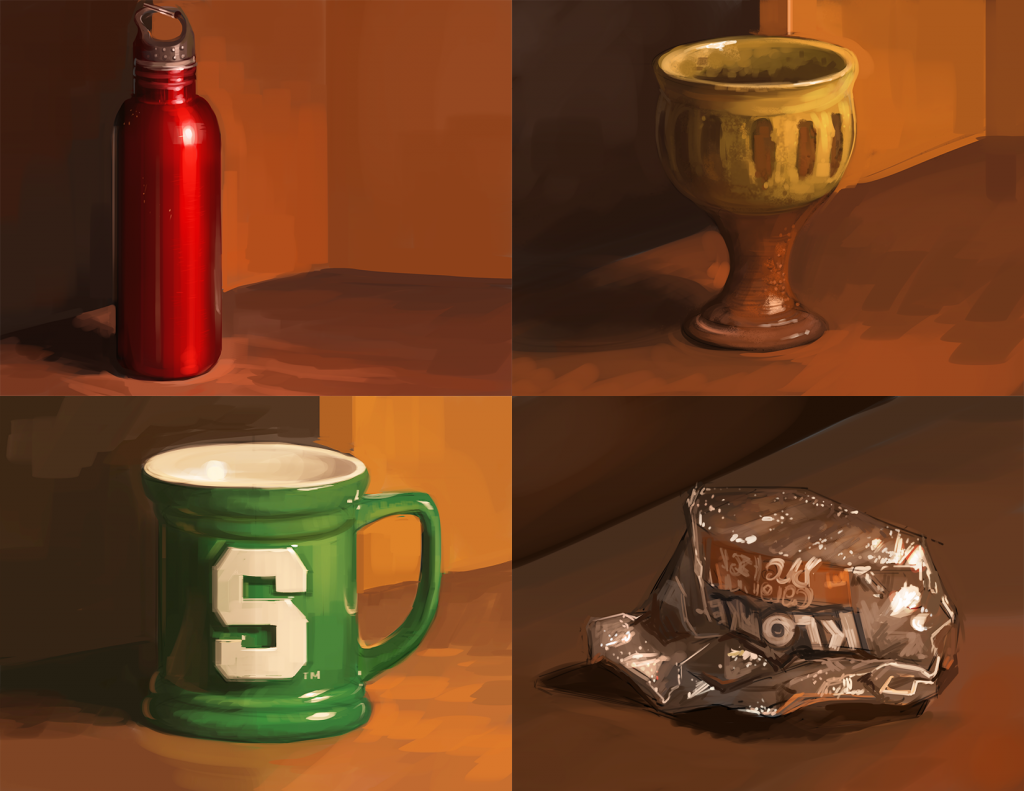
Observation to Imagination worksheet #7 (form)
"Simplify large buildings into basic forms using the ‘draw-through’ method. Ignore the small details. (Do 15.)"
Zeno Doodles
Zeno Clash 2! I don't know how I went so long without noticing it was released, but I've been playing it and it's amaaazing. Rimat was my favorite character from the first game, so I'm psyched she got bumped to full-on protagonist for the sequel. I could draw her and her 80's hair all day...
Observation to Imagination worksheet #6 (form) (extra credit)
Few more:
15. Simba (The Lion King)
16. Sam (Sam & Max)
17. Helga (Hey Arnold!)
18. Aladdin (Aladdin)
19. Max (Sam & Max)
20. Jafar (Aladdin)
Observation to Imagination worksheet #6 (form)
Ooo-kay. We are a BIT behind schedule, but you know what? That's okay. Setbacks happen. Sometimes you get sidetracked playing Harvest Moon for two weeks BUT there's always time to pick yourself up and get back on track. Expect more multiple posts per day for the next few weeks.
Latest Ctrl+Paint assignment: "Simplify cartoon characters into basic forms using the ‘draw-through’ method. Ignore the small details. (Do 10.)"
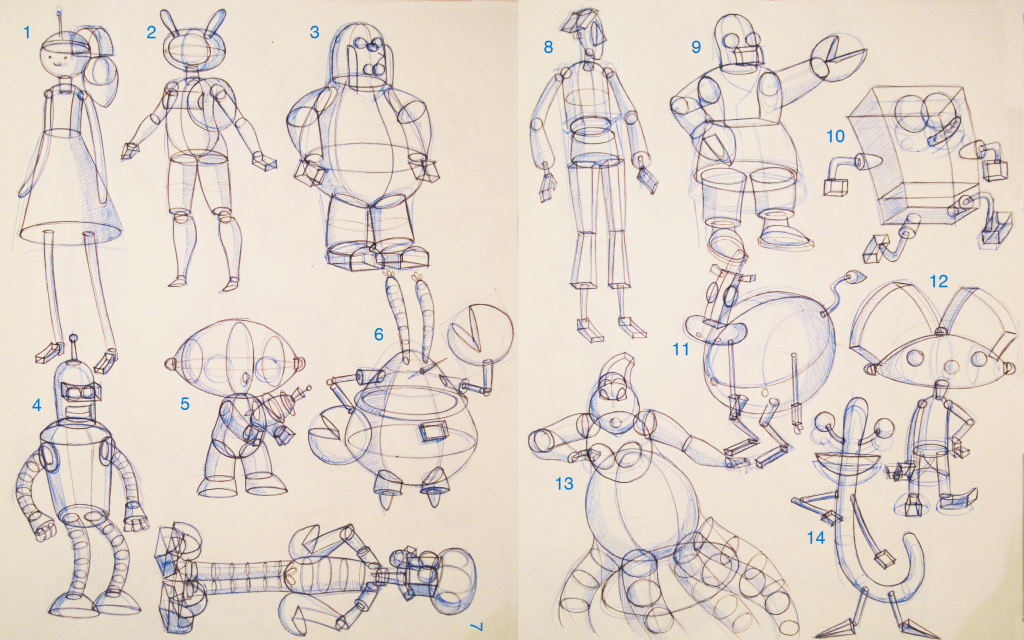
Can you tell who they are?
1. Princess Bubblegum (Adventure Time)
2. Fionna (Adventure Time)
3. Peter Griffin (Family Guy)
4. Bender (Futurama)
5. Stewie (Family Guy)
6. Mr. Krabs (Spongebob Squarepants)
7. Squidward (Spongebob Squarepants)
8. Guybrush (Curse of Monkey Island)
9. Dr. Zoidberg (Futurama)
10. Spongebob(Spongebob Squarepants)
11. Heifer (Rocko's Modern Life)
12. Arnold (Hey Arnold!)
13. Ursula (The Little Mermaid)
14. Oblina (Aaahh! Real Monsters)
Monday, May 20, 2013
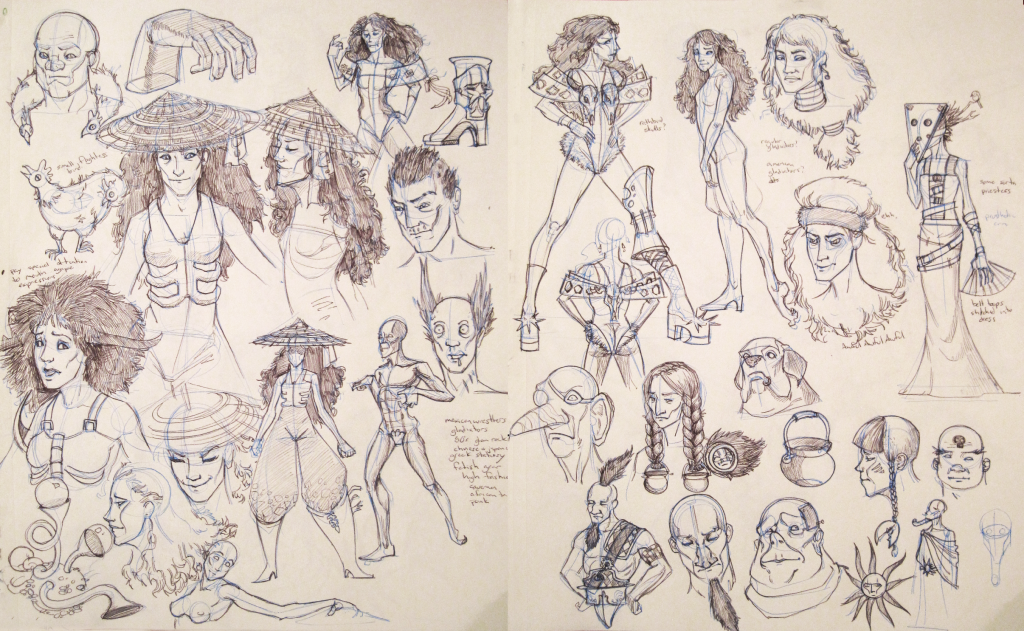
Expressions
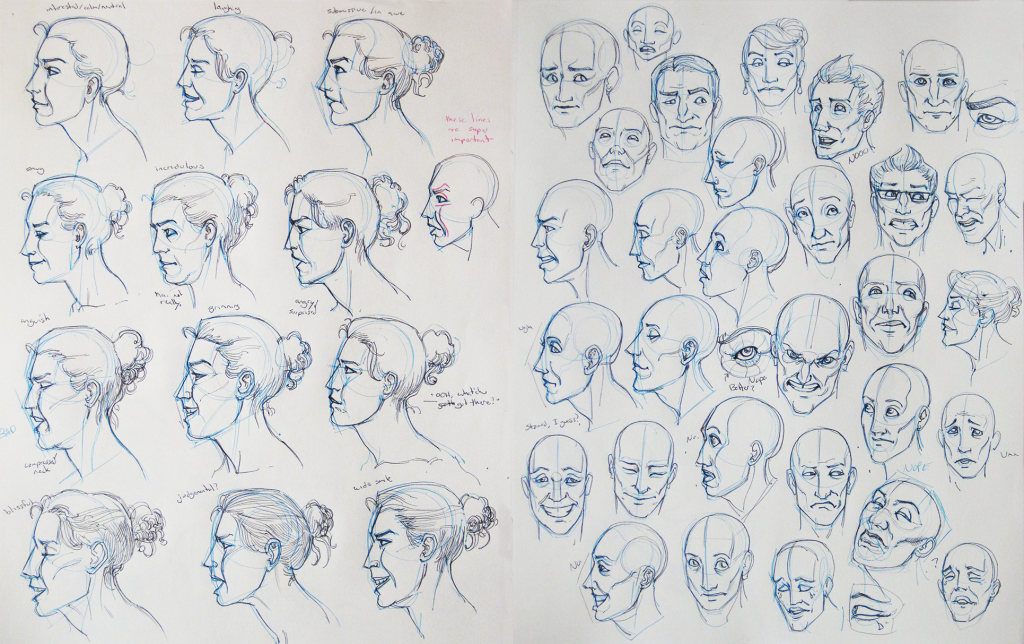
Those tricksy side expressions! Right are based on photos from deviantart, left are from imagination.

Sunday, May 19, 2013
Monday, May 13, 2013
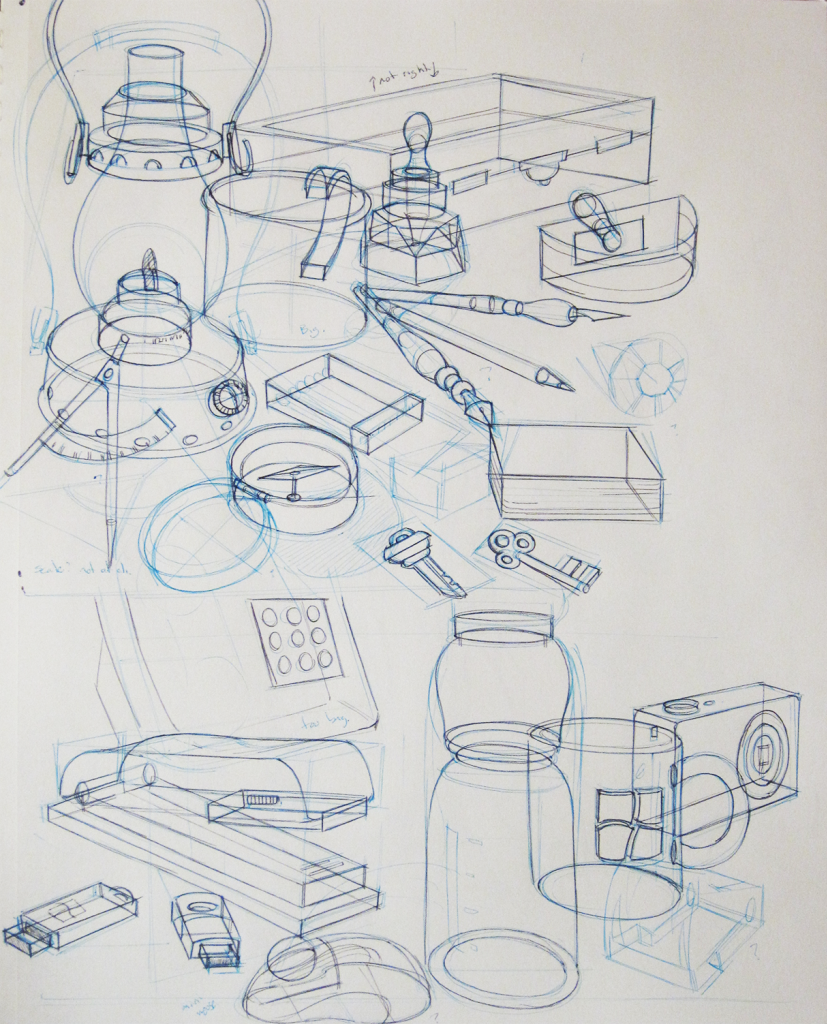
Observation to Imagination worksheet #5 (form)
"Invent a grouping of household objects and visualize them using the draw-through technique. (Do 2.)"
Bah, I should've drawn in some floor grids.
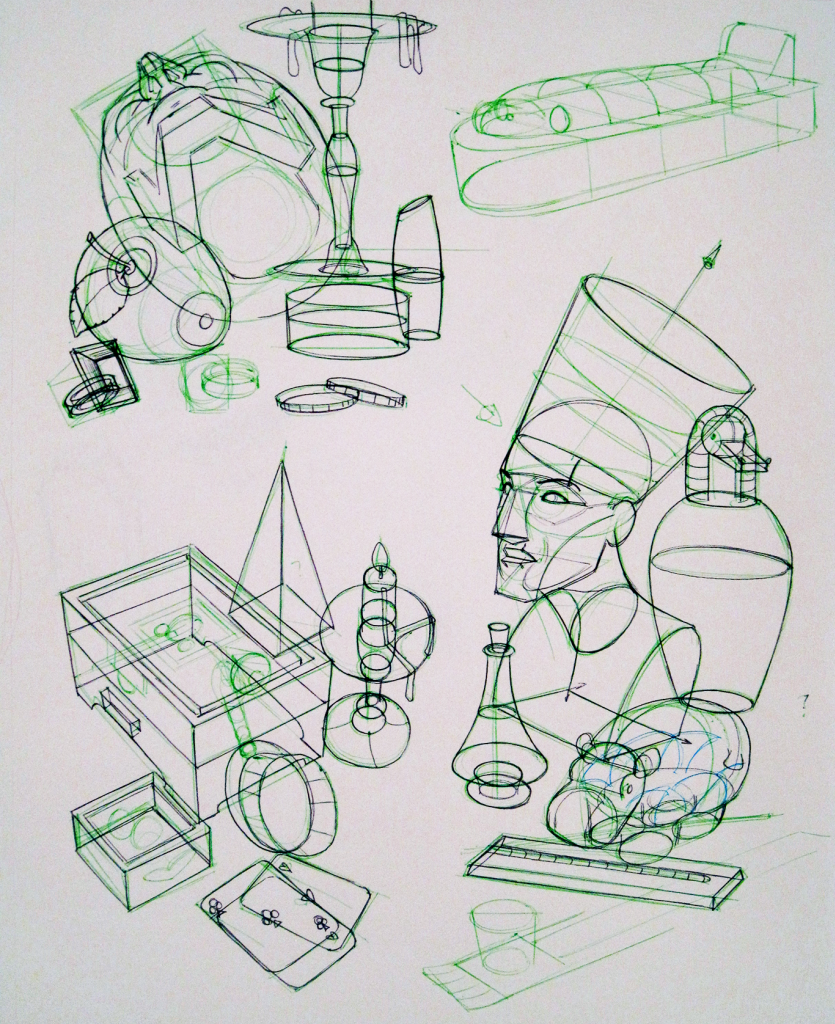
Observation to Imagination worksheet #4 (form) (extra credit)
I'm sure at least five of these are household objects....
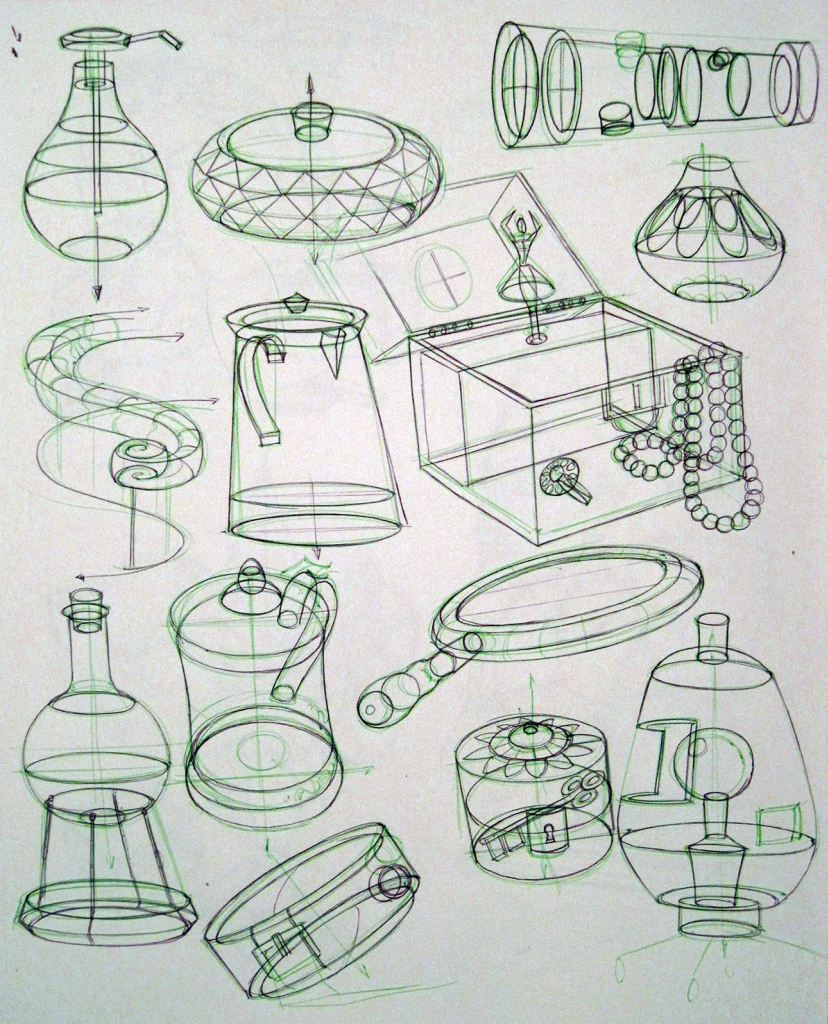
Observation to Imagination worksheet #4 (form)
"Invent a household object and visualize it using the draw-through technique. (Do 5.)"


I was feeling inspired by the vigors in Bioshock infinite, though mine aren't as cool.
Friday, May 10, 2013
Subscribe to:
Posts (Atom)