

and was all like, "I've finally solved zbrush tiling textures!" and the didn't say how I did it? Yeah, that was a dick move. It also bit me when I tried to do it again today, only to realize I'd more or less forgotten how. So, I spent some time retracing my steps and I think I've got it down again. This time I'm going to be smart about it and write it down.
This method holds some significant advantages over the better-known 2.5D + tilde key method illustrated here because it allows you to rotate the model while you work, but as we shall see it has some drawbacks, too.
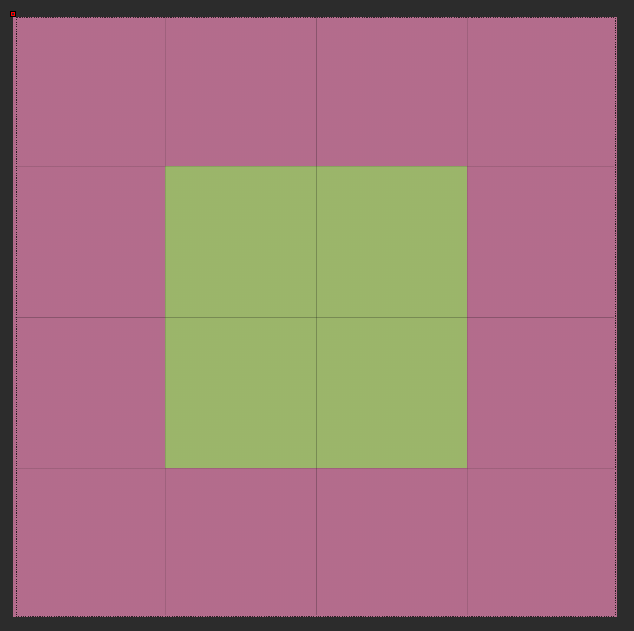
Create a 4x4 polyplane and group the middle four polys together. The yellow area is where our final texture is going to be.
Subdivide as many times as you think you'll need (without smoothing) and store a morph target.
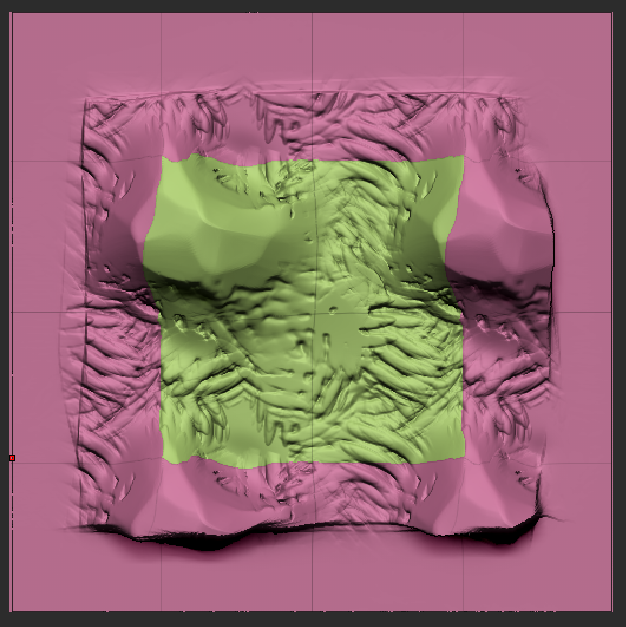
Sculpt to your heart's content, using brushes with wrap mode (brush>curve>WrapMode) set to 2.
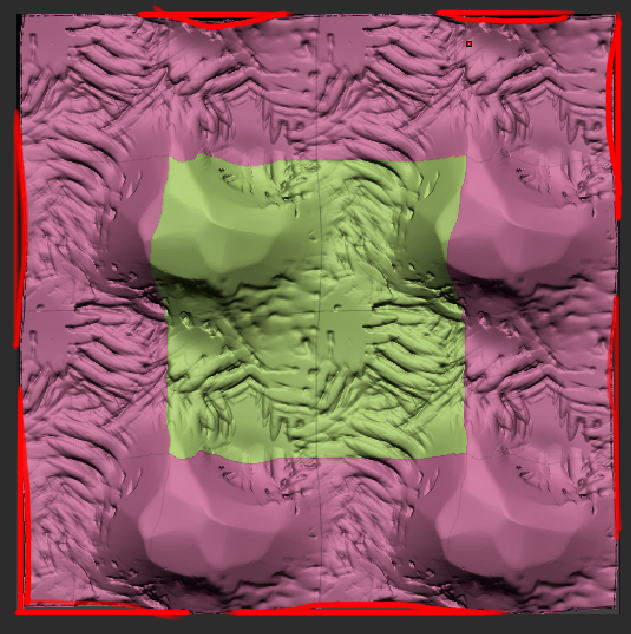
Time to break out the morph brush! Go to the highest subdiv level and carefully morph back the plane's borders, taking care not to get too close to the yellow area.
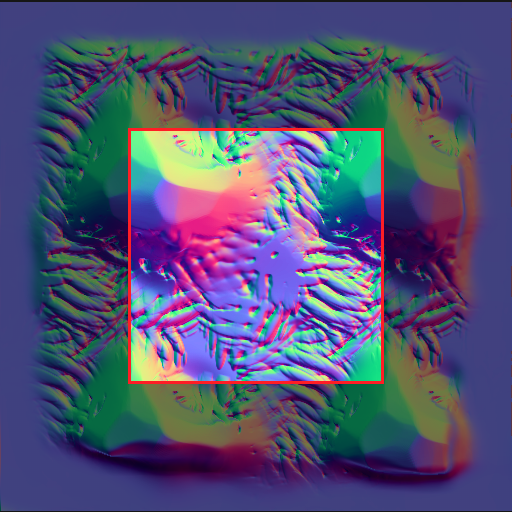
Frame the mesh, and use grabdoc to get maps for color, normals, and/or height.
Bring the maps into your image editor of choice and crop the canvas to 50%.
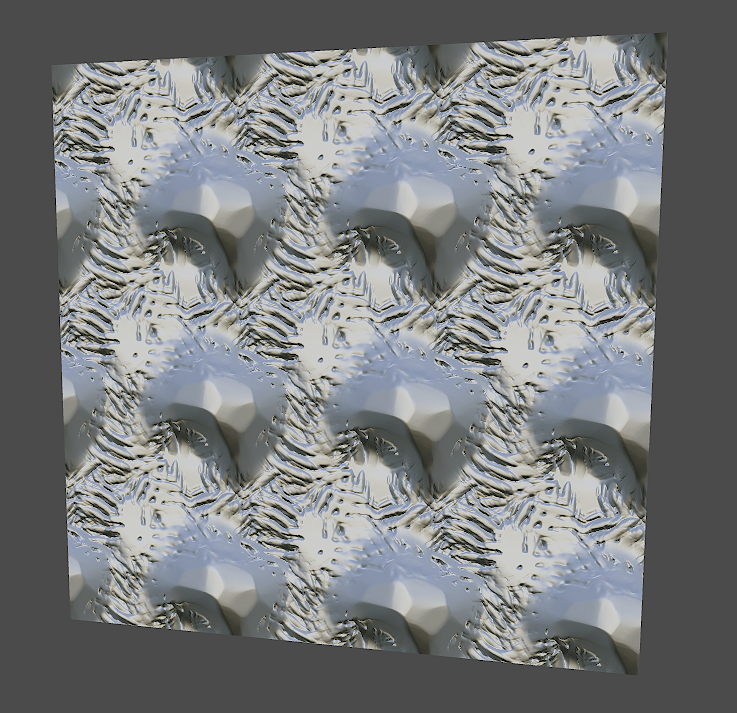
Voila! Perfectly tiling textures with NO seams whatsoever!
However, if you still want to use inserted meshes on the border area, there is a way to do so.
Position your subtool on the seam where you want it.
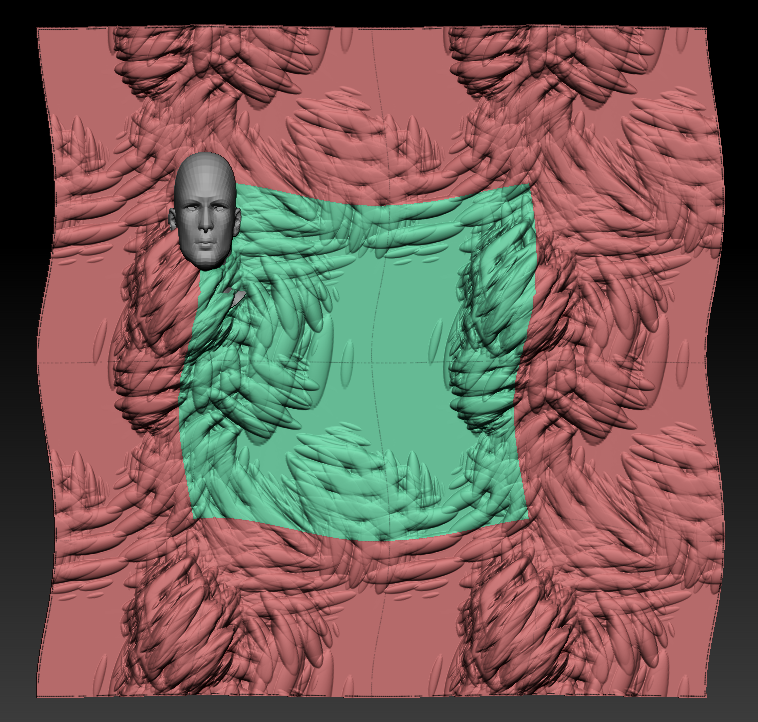
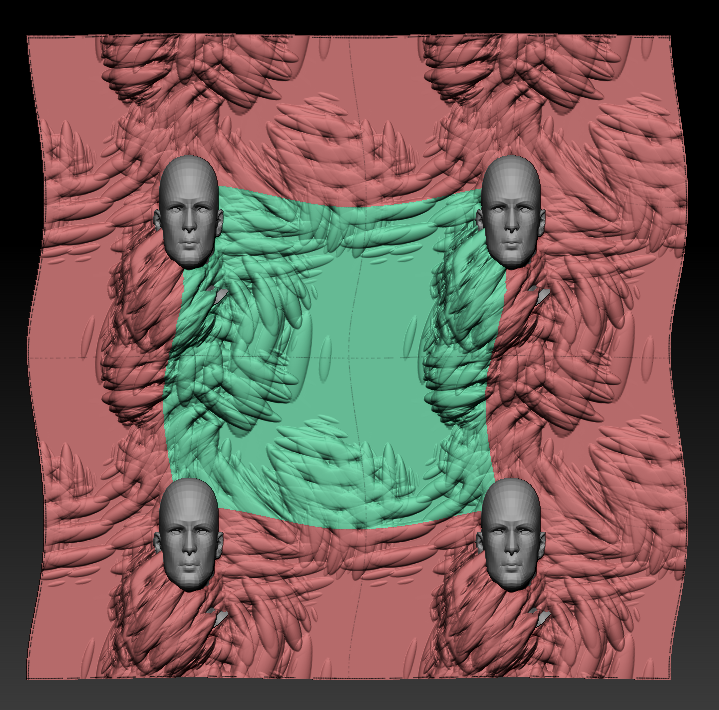
If the subtool intersects a corner you'll need to do this two more times, for all four corners. If you want to nudge them around afterwards, just merge them together and use the move tool to re-position.
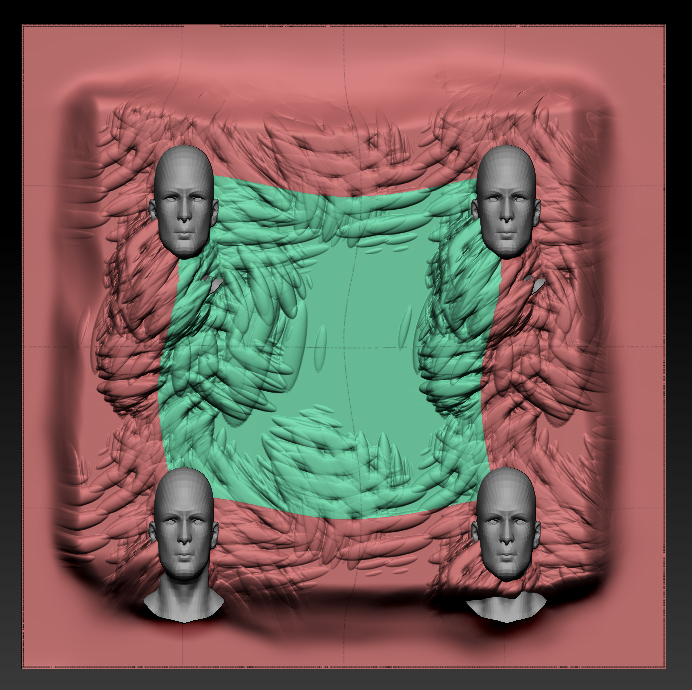
You can keep the ztools as they are and keep working, or grab the zproject brush (make sure it's set to wrap mode of 2) and use it on your plane to project details from the underlying subtools, then delete them when you're done.
When you're finished, morph back the borders as we did before, frame the document, and grab your maps!
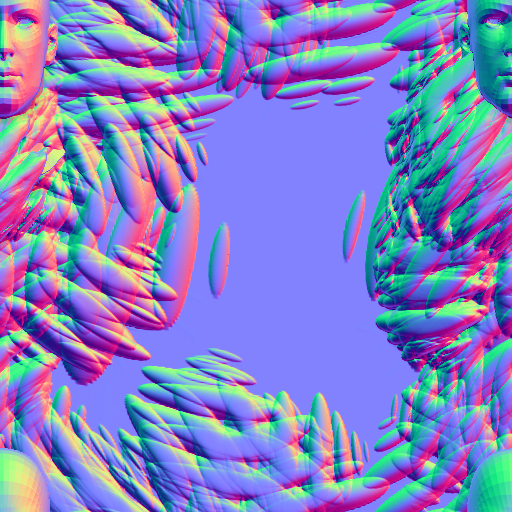
This is what my final, cropped normalmap looks like.
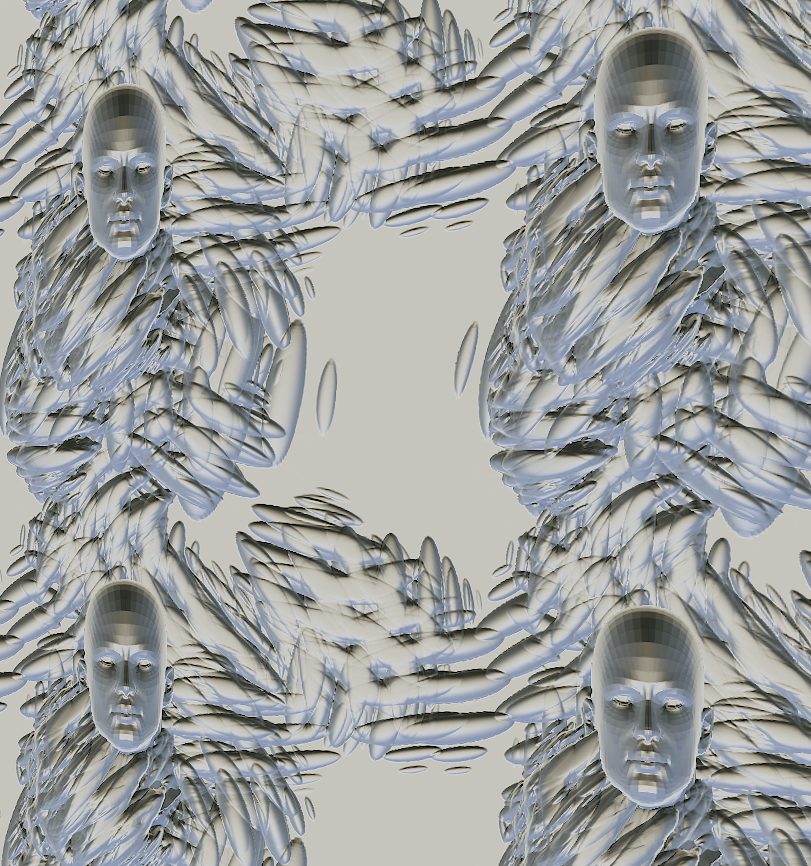
And here it is applied to a plane in Toolbag. Beautiful!
hello can u please upload the pictures again
ReplyDeleteI didn't try this method as I'm for the moment working on the Gumroad Forest Ground tutorial. One big differenfe is that in his tut, after having made the sculpting plane in Maya, he works with wrapmode set to 1 and all goes fine. Something I would like you to share here : I have a maybe 2 years old computer (i7-4770 4 cores 8 threads, 16GB RAm, GTX780) so not the most powerful around but far good enough for whatever I sculpt/model/paint. But as soon as I use the wrapmode, even set to 1, everything becomes so slow in ZBRush (with a 1.5Million polys plane only) that I don't really get how it is possible to make anything. I try to work with only alphas I slowly prepare on the side (for brick walls, grounds, etc) which speeds up the process. Using some scripts I try to use nanomeshes in wrapmode which also speeds up the process. But still, painting and sculpting in wrapmode would be nice but the slowness of the brush is just unbearable. Do you please have any idea of what might be the problem there ? Thanks in advance. And great tutorial by the way. I'm taking this webpage as a docx right away !
ReplyDeletehttps://sketchfab.com/hansolocambo/
hansolocambo@gmail.com